Author: Stefan

  • pfSense book available to everyone

    pfSense book available to everyone

    Today, Netgate made the pfSense book available for everyone for free.
    In the past this was a privelage to Gold-subscribers only. The book contains the complete documentation, made by Netgate with help from community supporters.
    This book is available in PDF and ePub version.

    View the news artical brought by Netgate at: https://www.netgate.com/blog/pfSense-book-available-to-everyone.html

    Interesting? Looking for a compact machine which can run this great software?
    Read also my other article on pfSense. My comments on installing on a Zotac Zbox Ci327

  • Proxmox – add SSD cache

    Proxmox – add SSD cache

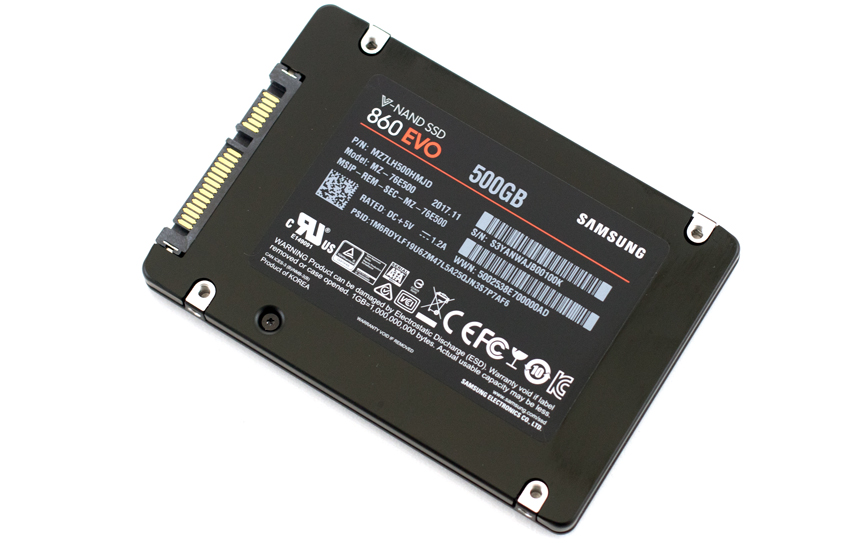
    To increase the speed of your ZFS pool, you can add a SSD cache for faster access, write- and read speeds.
    You have to make 2 partitions, one for cache and another for log.

    format ssd into 2 logical partitions, type 48.
    For example both partitions, half the size of the SSD.
    fdisk /dev/sdf

    Show status of the zpool
    zpool status

    Add partition sdf1 as cache
    zpool add rpool cache /dev/sdf1

    Add partition sdf2 as log
    zpool add rpool log /dev/sdf2

    Check your modified pool
    zpool status

  • PfSense on Zotac Zbox CI327

    Some helpfull notes when installing pfSense on your Zotac Zbox CI327.

    Install from usb stick

    • Preparing the drive
    • Download pfsense image
    • Write image to drive

    Known problems you can run in to.

    CI327 has Realtek NIC’s. For the best performance, you need to tweak some settings in the Gui:

    system/advance/network…

    • CHECK Disable hardware checksum offload
    • CHECK Disable hardware TCP segmentation offload
    • CHECK Disable hardware large receive offload

    Hanging during boot time

    Boot hangs showing the following line:

    Timecounter “HPET” frequency 19200000 Hz quality 950

    You can solve this by disabling in Bios:
    /Features/CPU Configuration/Monitor M-Wait -> disabled


  • Configure proxmox email notification

    Configure proxmox email notification

    Follow the steps below to configure the Proxmox email notification.

    1. Install the authentication library:
      apt-get install libsasl2-modules
    2. If Gmail has 2FA enabled, go to App Passwords and generate a new password just for Proxmox
    3. Create a password file:
      nano /etc/postfix/sasl_passwd
    4. Insert your login details:
      smtp.gmail.com youremail@gmail.com:yourpassword
    5. Save the password file
    6. Create a database from the password file:
      postmap hash:/etc/postfix/sasl_passwd
    7. Protect the text password file:
      chmod 600 /etc/postfix/sasl_passwd
    8. Edit the postfix configuration file:
      nano /etc/postfix/main.cf
    9. Add/change the following (certificates can be found in /etc/ssl/certs/):
      relayhost = smtp.gmail.com:587
      smtp_use_tls = yes
      smtp_sasl_auth_enable = yes
      smtp_sasl_security_options =
      smtp_sasl_password_maps = hash:/etc/postfix/sasl_passwd
      smtp_tls_CAfile = /etc/ssl/certs/Entrust_Root_Certification_Authority.pem
      smtp_tls_session_cache_database = btree:/var/lib/postfix/smtp_tls_session_cache
      smtp_tls_session_cache_timeout = 3600s
      
    10. Reload the updated configuration:postfix reload

    Testing

    echo "test message" | mail -s "test subject" youremail@gmail.com

  • Nextcloud update php5.6 to php7.0

    Nextcloud update php5.6 to php7.0

    Add these two lines to your /etc/apt/sources.list file
    deb http://packages.dotdeb.org jessie all
    deb-src http://packages.dotdeb.org jessie all

    Key installation
    wget http://www.dotdeb.org/dotdeb.gpg
    cat dotdeb.gpg | apt-key add -

    Update
    apt-get update

    Install PHP7
    apt-get install libapache2-mod-php7.0 php7.0-apcu php7.0-apcu-bc php7.0-cli php7.0-common php7.0-curl php7.0-gd php7.0-igbinary php7.0-imagick php7.0-imap php7.0-intl php7.0-json php7.0-mbstring php7.0-mcrypt php7.0-mysql php7.0-opcache php7.0-phpdbg php7.0-readline php7.0-redis php7.0-sqlite3 php7.0-xml php7.0-zip

    disable php5 enable php7
    a2dismod php5
    a2enmod php7.0
    service apache2 restart

    Modify the default php settings in php.ini for better performance:
    opcache.enable=1

    opcache.enable_cli=1

    opcache.interned_strings_buffer=8
    opcache.max_accelerated_files=10000

    opcache.memory_consumption=128
    opcache.save_comments=1
    opcache.revalidate_freq=1

  • Proxmox ZFS Failed To Import Pool ‘rpool’

    • boot into emergency mode (in the grub menu, hit “e”, and add ” emergency” to the end of the line starting with “linux”, then press ctrl+x)
    • if needed, manually import your rpool in the initramfs prompt like you did in your first post (“zpool import -N rpool” followed by “exit”)
    • enter your root password when prompted to enter maintenance/emergency mode
    • disable the zfs-import-scan.service (“systemctl disable zfs-import-scan”)
    • continue the boot (“exit” or ctrl+d)

    now you should be able to install the update with the fix, and then re-enable the zfs-import-scan service (“systemctl enable zfs-import-scan”) and reboot the host. I would recommend regenerating the initramfs (“update-initramfs -u”). if you are still dropped into the initramfs prompt after that, I would be very interested in your “pveversion -v” output and your grub config (“/boot/grub/grub.cfg”).

  • ZFS cheat sheet

    Pool Related Commands

    # zpool create datapool c0t0d0 Create a basic pool named datapool
    # zpool create -f datapool c0t0d0 Force the creation of a pool
    # zpool create -m /data datapool c0t0d0 Create a pool with a different mount point than the default.
    # zpool create datapool raidz c3t0d0 c3t1d0 c3t2d0 Create RAID-Z vdev pool
    # zpool add datapool raidz c4t0d0 c4t1d0 c4t2d0 Add RAID-Z vdev to pool datapool
    # zpool create datapool raidz1 c0t0d0 c0t1d0 c0t2d0 c0t3d0 c0t4d0 c0t5d0 Create RAID-Z1 pool
    # zpool create datapool raidz2 c0t0d0 c0t1d0 c0t2d0 c0t3d0 c0t4d0 c0t5d0 Create RAID-Z2 pool
    # zpool create datapool mirror c0t0d0 c0t5d0 Mirror c0t0d0 to c0t5d0
    # zpool create datapool mirror c0t0d0 c0t5d0 mirror c0t2d0 c0t4d0 disk c0t0d0 is mirrored with c0t5d0 and disk c0t2d0 is mirrored withc0t4d0
    # zpool add datapool mirror c3t0d0 c3t1d0 Add new mirrored vdev to datapool
    # zpool add datapool spare c1t3d0 Add spare device c1t3d0 to the datapool
    ## zpool create -n geekpool c1t3d0 Do a dry run on pool creation

    Show Pool Information

    # zpool status -x Show pool status
    # zpool status -v datapool Show individual pool status in verbose mode
    # zpool list Show all the pools
    # zpool list -o name,size Show particular properties of all the pools (here, name and size)
    # zpool list -Ho name Show all pools without headers and columns

    File-system/Volume related commands

    # zfs create datapool/fs1 Create file-system fs1 under datapool
    # zfs create -V 1gb datapool/vol01 Create 1 GB volume (Block device) in datapool
    # zfs destroy -r datapool destroy datapool and all datasets under it.
    # zfs destroy -fr datapool/data destroy file-system or volume (data) and all related snapshots

    Set ZFS file system properties

    # zfs set quota=1G datapool/fs1 Set quota of 1 GB on filesystem fs1
    # zfs set reservation=1G datapool/fs1 Set Reservation of 1 GB on filesystem fs1
    # zfs set mountpoint=legacy datapool/fs1 Disable ZFS auto mounting and enable mounting through /etc/vfstab.
    # zfs set sharenfs=on datapool/fs1 Share fs1 as NFS
    # zfs set compression=on datapool/fs1 Enable compression on fs1

    File-system/Volume related commands

    # zfs create datapool/fs1 Create file-system fs1 under datapool
    # zfs create -V 1gb datapool/vol01 Create 1 GB volume (Block device) in datapool
    # zfs destroy -r datapool destroy datapool and all datasets under it.
    # zfs destroy -fr datapool/data destroy file-system or volume (data) and all related snapshots

    Show file system info

    # zfs list List all ZFS file system
    # zfs get all datapool” List all properties of a ZFS file system

    Mount/Umount Related Commands

    # zfs set mountpoint=/data datapool/fs1 Set the mount-point of file system fs1 to /data
    # zfs mount datapool/fs1 Mount fs1 file system
    # zfs umount datapool/fs1 Umount ZFS file system fs1
    # zfs mount -a Mount all ZFS file systems
    # zfs umount -a Umount all ZFS file systems

    ZFS I/O performance

    # zpool iostat 2 Display ZFS I/O Statistics every 2 seconds
    # zpool iostat -v 2 Display detailed ZFS I/O statistics every 2 seconds

    ZFS maintenance commands

    # zpool scrub datapool Run scrub on all file systems under data pool
    # zpool offline -t datapool c0t0d0 Temporarily offline a disk (until next reboot)
    # zpool online Online a disk to clear error count
    # zpool clear Clear error count without a need to the disk

    Import/Export Commands

    # zpool import List pools available for import
    # zpool import -a Imports all pools found in the search directories
    # zpool import -d To search for pools with block devices not located in /dev/dsk
    # zpool import -d /zfs datapool Search for a pool with block devices created in /zfs
    # zpool import oldpool newpool Import a pool originally named oldpool under new name newpool
    # zpool import 3987837483 Import pool using pool ID
    # zpool export datapool Deport a ZFS pool named mypool
    # zpool export -f datapool Force the unmount and deport of a ZFS pool

    Snapshot Commands

    # zfs snapshot datapool/fs1@12jan2014 Create a snapshot named 12jan2014 of the fs1 filesystem
    # zfs list -t snapshot List snapshots
    # zfs rollback -r datapool/fs1@10jan2014 Roll back to 10jan2014 (recursively destroy intermediate snapshots)
    # zfs rollback -rf datapool/fs1@10jan2014 Roll back must and force unmount and remount
    # zfs destroy datapool/fs1@10jan2014 Destroy snapshot created earlier
    # zfs send datapool/fs1@oct2013 &gt /geekpool/fs1/oct2013.bak Take a backup of ZFS snapshot locally
    # zfs receive anotherpool/fs1 &lt /geekpool/fs1/oct2013.bak Restore from the snapshot backup backup taken
    # zfs send datapool/fs1@oct2013 | zfs receive anotherpool/fs1 Combine the send and receive operation
    # zfs send datapool/fs1@oct2013 | ssh node02 “zfs receive testpool/testfs” Send the snapshot to a remote system node02

    Clone Commands

    # zfs clone datapool/fs1@10jan2014 /clones/fs1 Clone an existing snapshot
    # zfs destroy datapool/fs1@10jan2014 Destroy clone
  • Proxmox Paths

    Proxmox Paths

    local-lvm (pve)
    /dev/pve

    hdd-1tb (pve)
    /dev/hdd-1tb

    synology (pve)
    /mnt/pve/synology

  • Proxmox – Change VM ID

    Change VMID from 100 to 302

    Stop/Shutdown a VM.

      1. Login using SSH to Proxmox Machine or using Shell menu in Web Interface.
      2. Rename image directory name and image filename.
        root@PROXMOX01:/# cd /dev/pve
        root@PROXMOX01:/dev/pve# ls
        root swap vm-100-disk-1
        root@PROXMOX01:/dev/pve# mv vm-100-disk-1 vm-302-disk-1
        root@PROXMOX01:/dev/pve# ls
        vm-302-disk-1.qcow2

    (more…)