Blog

  • Raspberry Pi Static ip address

    Edit /etc/dhcpcd.conf

    sudo nano /etc/dhcpcd.conf

    Add the following rows add the bottom of the text. Leave the default text intact.

    interface eth0
    static ip_address=192.168.1.99
    interface wlan0
    static ip_address=192.168.1.100
    static routers=192.168.1.1
    static domain_name_servers=202.62.64.3 8.8.8.8

    Reboot

  • Daily backup to external hdd

    Daily backup to external hdd

    Goal

    Domoticz has a built in feature to automatically create hourly, daily and monthly database backups in the /home/pi/domoticz/backups/ directory. You just need to tick the Enable Automatic Backup option in System setup.
    However in the case the SD-card crashes and is no longer accessible, a lot of work still could be lost.
    This page will provide you several backupscripts, each with other functions.

    Preparation

    Search the folder on your Network Attached Storage (NAS) where you want the backups to be stored. Check that FTP is enabled and have login credentials available.

    Make sure that if you have enabled website protection, e.g. if your Domoticz webpage is password protected, that you enable Local Networks (no username/password)in your settings. Fill in your local network IP-address (192.168.1.* for example), otherwise the backup will fail.

    Place the script below in:/home/pi/domoticz/scripts and change the parameters to reflect to your settings. (more…)

  • OpenSSH server install Ubuntu

    1. To install it, open terminal (Ctrl+Alt+T) or log in Ubuntu server and run command:

    sudo apt-get install openssh-server

    2. After that, you should have SSH service enabled in your system, you may check its status by running command:

    sudo service ssh status

    3. You may change some settings (e.g., the listening port, and root login permission) by editing the configuration file via command:

    sudo nano /etc/ssh/sshd_config

    On Ubuntu desktop, you may use gedit instead of nano:

    Finally apply the changes by restarting or reloading SSH:

    sudo service ssh restart
  • Redirect domain to directory in other domain.

    # Redirect all pages from olddomain.com
    # to newdomain.com

    Options +FollowSymLinks
    RewriteEngine on
    RewriteCond %{HTTP_HOST} ^www.olddomain.com$ [OR]
    RewriteCond %{HTTP_HOST} ^olddomain.com$
    RewriteRule ^(.*)$ http://www.newdomain.com/$1 [R=301,L]
  • Mount Windows Shares Permanently

    CIFS installation

    sudo apt-get install cifs-utils

    Mounting unprotected (guest) network folders

    First, let’s create the mount directory. You will need a separate directory for each mount.

    sudo mkdir /media/windowsshare

    Then edit your /etc/fstab file (with root privileges) to add this line: (more…)

  • Traccar in docker

    Run the following command:

    docker run -d --privileged -p 8082:8082 -p 5005:5013 -p 5055:5055 magnaz/traccar

    Webserver adres: 808
    RF-V16 tracker: Send by tracker on port 5013, received by Traccar on port 5005. (needed to use the right protocol)
    Traccar Android client: 5055

  • Linux File Permissions

    Linux File Permissions

    Explanation

    For example: dwrxr–r– You can split this in 4 segmenst: d wrx r– r–
    d means the name is a directory. wrx is the first of 3 permission segments, and represents the owner. The next segment is for the same group users, and the last is for other users like guests.

    Above stands for: directory, writable, readable, exacutable. Readable (by same group user), Not writable (by same group user), only readable by other (guest) users.

    Change permissions

    Change fileperission on newfile.txt

    chmod 660 newfile.txt

    660 is a binary notation which represents the permission level.
    7 Read-write-execute
    6 Read-write
    5 Read-execute
    4 Read
    3 Write-Execute
    2 Write
    1 Execute
    0 No permissions

  • Pi-Hole DNS AdBlocker

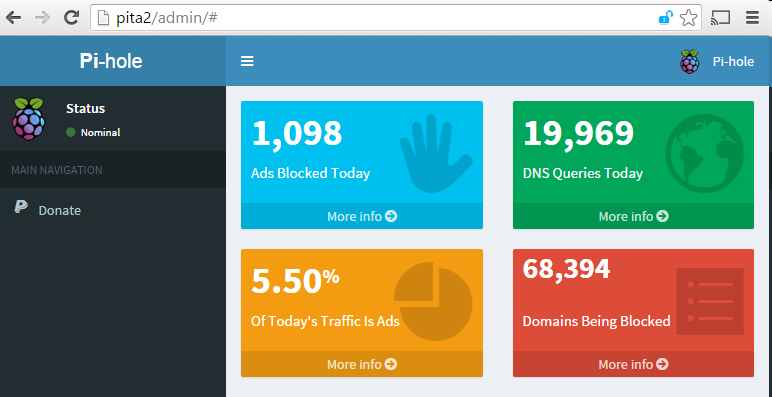
    Pi-Hole DNS AdBlocker

    Install

    Run the following script:

    curl -sSL https://install.pi-hole.net | bash

    Update

    Just run the following script:

    pihole -up
  • Running Ubuntu full-screen in Virtualbox

    Running Ubuntu full-screen in Virtualbox

    Install Ubuntu in Virtualbox. It’s not directly possible to run Native full-screen resolution.

    Follow the next steps to solve this problem:

    • Select from ‘Devices’ in the titlebar the option ‘Guest additions’.
    • Reboot the virtual machine.
    • Press the host-key (by default right-CTRL) and F simultainously.

    The screen turns full-screen Ubuntu in native resolution.

  • Traccar installation on Raspberry Pi

    Traccar installation on Raspberry Pi

    Download and install Traccar

    Download Traccar

    wget https://github.com/tananaev/traccar/releases/download/v3.4/traccar-linux-arm-3.4.zip

    Unzip downloadfile

    unzip traccar-linux-arm-3.4.zip

    Remove zipfile

    rm traccar-linux-arm-3.4.zip

    Run install script

    sudo ./traccar.run

    Start Traccar Server

    sudo java -jar /opt/traccar/tracker-server.jar

    Optional configuration

    Make autostart on boot

    Start crontab

    crontab -e

    Add following line to the bottom of the file

    @reboot /usr/bin/nohup /usr/bin/java -jar /opt/traccar/tracker-server.jar

    Exit crontab and save file

    Reboot Raspberry Pi

    sudo reboot

    (Source: http://www.forum-raspberrypi.de/Thread-tutorial-tracking-server-mit-traccar)

    Use an external MySQL database like Synology

    By default Traccar Server uses embedded H2 database. If you want to use MySQL database engine you need to replace following lines in configuration file:

    <entry key='database.driver'>org.h2.Driver</entry>
    <entry key='database.url'>jdbc:h2:/home/user/Documents/traccar/target/database</entry>
    <entry key='database.user'>sa</entry>
    <entry key='database.password'></entry>

    Configuration parameters for MySQL (replace 127.0.0.1, [DATABASE], [USER], [PASSWORD] with appropriate values):

    <entry key='database.driver'>com.mysql.jdbc.Driver</entry> 
    <entry key='database.url'>jdbc:mysql://127.0.0.1:3306/[DATABASE]?allowMultiQueries=true&amp;autoReconnect=true&amp;useUnicode=yes&amp;characterEncoding=latin1&amp;sessionVariables=sql_mode=ANSI_QUOTES</entry>
    <entry key='database.user'>[USER]</entry> 
    <entry key='database.password'>[PASSWORD]</entry>

    NOTE: Traccar will create tables for you, but you need to create database with selected name by yourself.
    (source: https://www.traccar.org/mysql/

    Configuration of devices

    RF-V16

    Device transmits on port 5005. Traccar listens default to this protocol (H02) on port 5013. Make port forward in router 5005 → 5013 or swap port numbers in .xml configuration file.

    Known issues

    Using Synology MySQL database (update)

    = (UPDATE) PROBLEM SOLVED in version 3.4 = You can make version 3.3 work with the Synology MySQL database with a small modification. Change in the .XML configurationfile ‘UTF-8’ to ‘latin-1’. The developer know this problem and it will be solved in the near future.

    Version 3.2 works great without this specific modifcation