Tag: linux

  • How to upgrade kernel to latest version on Ubuntu 20.04 Focal Fossa Linux

    (source: https://linuxconfig.org/how-to-upgrade-kernel-to-latest-version-on-ubuntu-20-04-focal-fossa-linux)

    In this tutorial you will learn:

    • How to install kernel upgrade script utility
    • How to to upgrade kernel to latest version
    • How to uninstall previously installed PPA kernels

    Upgrade kernel to latest version on Ubuntu 20.04 Focal Fossa Linux

    Software Requirements and Conventions Used

    CategoryRequirements, Conventions or Software Version Used
    SystemInstalled Ubuntu 20.04 or upgraded Ubuntu 20.04 Focal Fossa
    Softwareubuntu-mainline-kernel.sh
    OtherPrivileged access to your Linux system as root or via the sudo command.
    Conventions# – requires given linux commands to be executed with root privileges either directly as a root user or by use of sudo command
    $ – requires given linux commands to be executed as a regular non-privileged user

    Upgrade kernel to latest version on Ubuntu 20.04 step by step instructions

    1. First step is to download the ubuntu-mainline-kernel.sh Bash script utility. Open up your terminal and enter:
      $ wget https://raw.githubusercontent.com/pimlie/ubuntu-mainline-kernel.sh/master/ubuntu-mainline-kernel.sh
    2. Next, step is to install the previously downloaded script into our executable path:
      $ sudo install ubuntu-mainline-kernel.sh /usr/local/bin/
    3. All is ready to upgrade the Ubuntu kernel to the latest version. To do so run do following command:
      $ ubuntu-mainline-kernel.sh -i

      Finding latest version available on kernel.ubuntu.com Latest version is: v5.4.3, continue? (y/N) The above command will search for the latest kernel version available. To continue with the kernel installation answer y.
    4. Reboot your Ubuntu system and check for the loaded Kernel version:
      $ uname -rs Latest Kernel version upgrade
    5. To uninstall the PPA kernel version execute the following command and follow to wizard:
      $ ubuntu-mainline-kernel.sh -u
  • Proxmox – Add external usb drive to LXC container

    Proxmox – Add external usb drive to LXC container

    How to mount an external USB(3) drive to a LXC container

    In this example we make use of a Western Digital 1TB external USB3 drive.
    This device is NTFS formatted, which is easy to handle in Windows.

    Our container is used for samba services and has ID 102.

    At the host system (Proxmox)

    – Check which device the drive has been given on the host.
    lsblk (in this case ‘sdg’, partition ‘sdg1’)

    – Add a mounting location
    mkdir /mnt/ext-usb

    – Install the ntfs-3g package
    apt-get update && apt-get install ntfs-3g

    – Mount the disk to the mountlocation
    mount -t ntfs-3g /dev/sdg1 /mnt/ext-usb

    AT LXC client (container)

    – Add a mount location inside the LXC container
    mkdir /mnt/ext-usb

    At the host

    – Mount the drive to the container in this example we use mp1 (check if mp1 is not allready used!)
    pct set 102 -mp1 /mnt/ext-usb,mp=/mnt/ext-usb

  • ZFS cheat sheet

    Pool Related Commands

    # zpool create datapool c0t0d0 Create a basic pool named datapool
    # zpool create -f datapool c0t0d0 Force the creation of a pool
    # zpool create -m /data datapool c0t0d0 Create a pool with a different mount point than the default.
    # zpool create datapool raidz c3t0d0 c3t1d0 c3t2d0 Create RAID-Z vdev pool
    # zpool add datapool raidz c4t0d0 c4t1d0 c4t2d0 Add RAID-Z vdev to pool datapool
    # zpool create datapool raidz1 c0t0d0 c0t1d0 c0t2d0 c0t3d0 c0t4d0 c0t5d0 Create RAID-Z1 pool
    # zpool create datapool raidz2 c0t0d0 c0t1d0 c0t2d0 c0t3d0 c0t4d0 c0t5d0 Create RAID-Z2 pool
    # zpool create datapool mirror c0t0d0 c0t5d0 Mirror c0t0d0 to c0t5d0
    # zpool create datapool mirror c0t0d0 c0t5d0 mirror c0t2d0 c0t4d0 disk c0t0d0 is mirrored with c0t5d0 and disk c0t2d0 is mirrored withc0t4d0
    # zpool add datapool mirror c3t0d0 c3t1d0 Add new mirrored vdev to datapool
    # zpool add datapool spare c1t3d0 Add spare device c1t3d0 to the datapool
    ## zpool create -n geekpool c1t3d0 Do a dry run on pool creation

    Show Pool Information

    # zpool status -x Show pool status
    # zpool status -v datapool Show individual pool status in verbose mode
    # zpool list Show all the pools
    # zpool list -o name,size Show particular properties of all the pools (here, name and size)
    # zpool list -Ho name Show all pools without headers and columns

    File-system/Volume related commands

    # zfs create datapool/fs1 Create file-system fs1 under datapool
    # zfs create -V 1gb datapool/vol01 Create 1 GB volume (Block device) in datapool
    # zfs destroy -r datapool destroy datapool and all datasets under it.
    # zfs destroy -fr datapool/data destroy file-system or volume (data) and all related snapshots

    Set ZFS file system properties

    # zfs set quota=1G datapool/fs1 Set quota of 1 GB on filesystem fs1
    # zfs set reservation=1G datapool/fs1 Set Reservation of 1 GB on filesystem fs1
    # zfs set mountpoint=legacy datapool/fs1 Disable ZFS auto mounting and enable mounting through /etc/vfstab.
    # zfs set sharenfs=on datapool/fs1 Share fs1 as NFS
    # zfs set compression=on datapool/fs1 Enable compression on fs1

    File-system/Volume related commands

    # zfs create datapool/fs1 Create file-system fs1 under datapool
    # zfs create -V 1gb datapool/vol01 Create 1 GB volume (Block device) in datapool
    # zfs destroy -r datapool destroy datapool and all datasets under it.
    # zfs destroy -fr datapool/data destroy file-system or volume (data) and all related snapshots

    Show file system info

    # zfs list List all ZFS file system
    # zfs get all datapool” List all properties of a ZFS file system

    Mount/Umount Related Commands

    # zfs set mountpoint=/data datapool/fs1 Set the mount-point of file system fs1 to /data
    # zfs mount datapool/fs1 Mount fs1 file system
    # zfs umount datapool/fs1 Umount ZFS file system fs1
    # zfs mount -a Mount all ZFS file systems
    # zfs umount -a Umount all ZFS file systems

    ZFS I/O performance

    # zpool iostat 2 Display ZFS I/O Statistics every 2 seconds
    # zpool iostat -v 2 Display detailed ZFS I/O statistics every 2 seconds

    ZFS maintenance commands

    # zpool scrub datapool Run scrub on all file systems under data pool
    # zpool offline -t datapool c0t0d0 Temporarily offline a disk (until next reboot)
    # zpool online Online a disk to clear error count
    # zpool clear Clear error count without a need to the disk

    Import/Export Commands

    # zpool import List pools available for import
    # zpool import -a Imports all pools found in the search directories
    # zpool import -d To search for pools with block devices not located in /dev/dsk
    # zpool import -d /zfs datapool Search for a pool with block devices created in /zfs
    # zpool import oldpool newpool Import a pool originally named oldpool under new name newpool
    # zpool import 3987837483 Import pool using pool ID
    # zpool export datapool Deport a ZFS pool named mypool
    # zpool export -f datapool Force the unmount and deport of a ZFS pool

    Snapshot Commands

    # zfs snapshot datapool/fs1@12jan2014 Create a snapshot named 12jan2014 of the fs1 filesystem
    # zfs list -t snapshot List snapshots
    # zfs rollback -r datapool/fs1@10jan2014 Roll back to 10jan2014 (recursively destroy intermediate snapshots)
    # zfs rollback -rf datapool/fs1@10jan2014 Roll back must and force unmount and remount
    # zfs destroy datapool/fs1@10jan2014 Destroy snapshot created earlier
    # zfs send datapool/fs1@oct2013 &gt /geekpool/fs1/oct2013.bak Take a backup of ZFS snapshot locally
    # zfs receive anotherpool/fs1 &lt /geekpool/fs1/oct2013.bak Restore from the snapshot backup backup taken
    # zfs send datapool/fs1@oct2013 | zfs receive anotherpool/fs1 Combine the send and receive operation
    # zfs send datapool/fs1@oct2013 | ssh node02 “zfs receive testpool/testfs” Send the snapshot to a remote system node02

    Clone Commands

    # zfs clone datapool/fs1@10jan2014 /clones/fs1 Clone an existing snapshot
    # zfs destroy datapool/fs1@10jan2014 Destroy clone
  • Proxmox – Change VM ID

    Change VMID from 100 to 302

    Stop/Shutdown a VM.

      1. Login using SSH to Proxmox Machine or using Shell menu in Web Interface.
      2. Rename image directory name and image filename.
        root@PROXMOX01:/# cd /dev/pve
        root@PROXMOX01:/dev/pve# ls
        root swap vm-100-disk-1
        root@PROXMOX01:/dev/pve# mv vm-100-disk-1 vm-302-disk-1
        root@PROXMOX01:/dev/pve# ls
        vm-302-disk-1.qcow2

    (more…)

  • How To Use Systemctl to Manage Systemd Services and Units

    All credits to:

    jellingwood @ Digitalocean.com

     Introduction

    Systemd is an init system and system manager that is widely becoming the new standard for Linux machines. While there are considerable opinions about whether systemd is an improvement over the traditional SysV init systems it is replacing, the majority of distributions plan to adopt it or have already done so.

    Due to its heavy adoption, familiarizing yourself with systemd is well worth the trouble, as it will make administrating these servers considerably easier. Learning about and utilizing the tools and daemons that comprise systemd will help you better appreciate the power, flexibility, and capabilities it provides, or at least help you to do your job with minimal hassle.

    In this guide, we will be discussing the systemctl command, which is the central management tool for controlling the init system. We will cover how to manage services, check statuses, change system states, and work with the configuration files.

  • Change linux hostname

    How to change the hostname of the system

    sudo hostname (new hostname)


    Change old hostname also in the following file:

    sudo nano /etc/hosts


  • Linux File Permissions

    Linux File Permissions

    Explanation

    For example: dwrxr–r– You can split this in 4 segmenst: d wrx r– r–
    d means the name is a directory. wrx is the first of 3 permission segments, and represents the owner. The next segment is for the same group users, and the last is for other users like guests.

    Above stands for: directory, writable, readable, exacutable. Readable (by same group user), Not writable (by same group user), only readable by other (guest) users.

    Change permissions

    Change fileperission on newfile.txt

    chmod 660 newfile.txt

    660 is a binary notation which represents the permission level.
    7 Read-write-execute
    6 Read-write
    5 Read-execute
    4 Read
    3 Write-Execute
    2 Write
    1 Execute
    0 No permissions

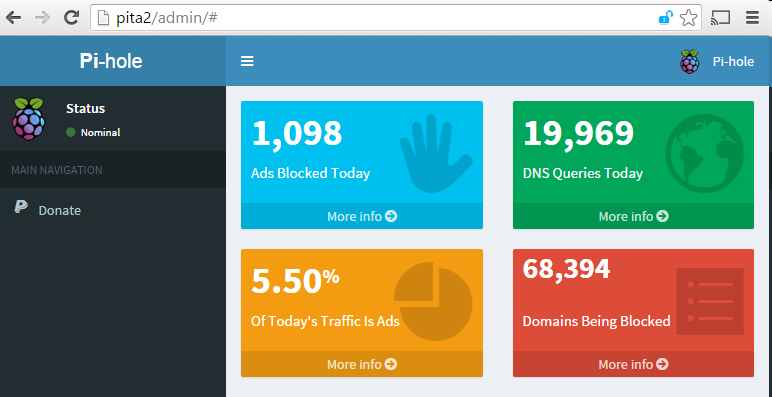
  • Pi-Hole DNS AdBlocker

    Pi-Hole DNS AdBlocker

    Install

    Run the following script:

    curl -sSL https://install.pi-hole.net | bash

    Update

    Just run the following script:

    pihole -up
  • Bookmark network share

    Open nautilus explorer.
    Go to network → Connect to server.
    Enter path, for example:

    smb://192.168.0.10

    Enter username, domain and password.
    Rename the bookmark as you wish with right-click → rename.